How to Burn 200 Cals at home with these 12 Exercises!
Let’s face it, most of us want to burn as many calories as possible in the shortest amount of time possible! No need to race to the gym either when you have a bank of great exercises you can do in the comfort of your lounge room.
All these exercises are ones our mums do at home and as a part of the 28 Day Weight Loss Challenge which has hundreds of workouts for all fitness levels.
This is a full-body workout that utilises all 620 muscles! Repeat the workout until you have torched 200 cals. Do all 12 exercises 3 times for a 20-minute workout.
Our amazing Healthy Mummy Fitness Trainer Wendy showcases how to perfect these 12 exercises.
12 Exercises to Burn 200 cals!
1. Marching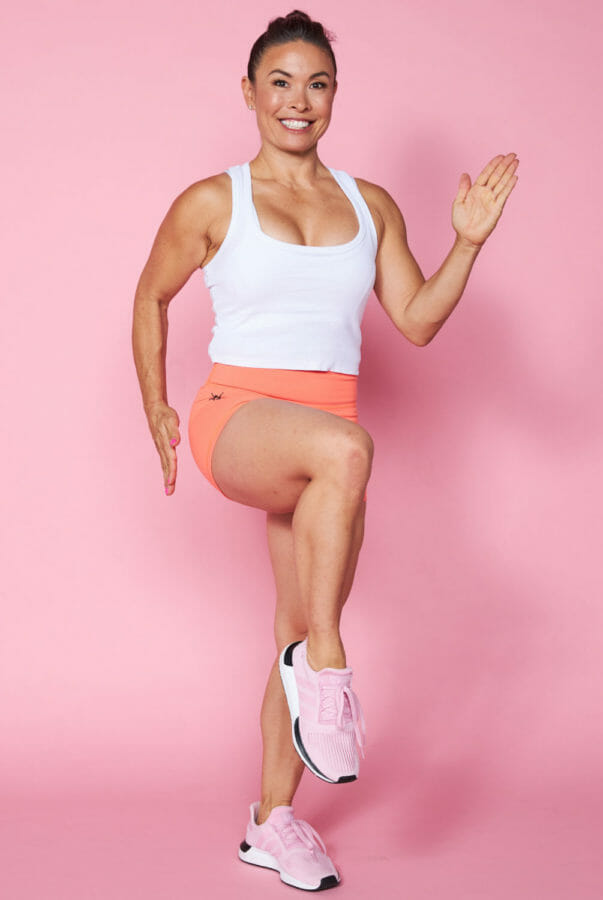 Technique
Lift one knee up until your calf and thigh forms a right angle. Lower that leg and repeat with the other leg. REPS: x 30
Beginners – Walking on the spot
Experienced – Marching with high knees
Tips
- Keep you back straight and hold your head up high.
- Hold your abs in and keep your chest proud.
- Remember to breathe deeply.
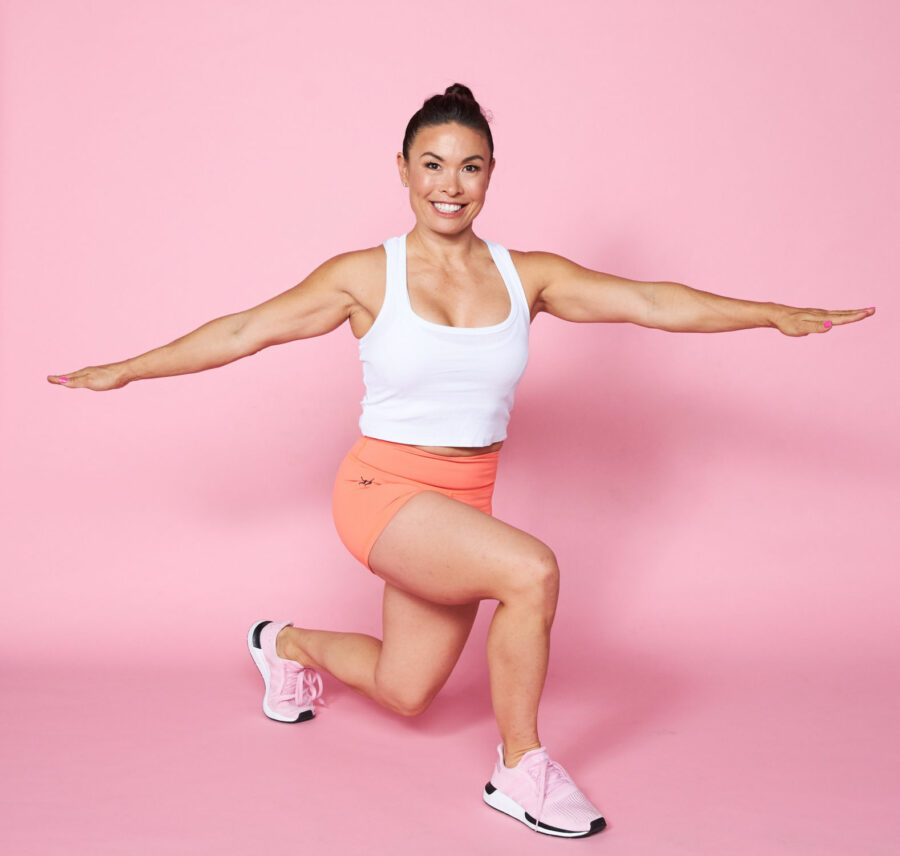
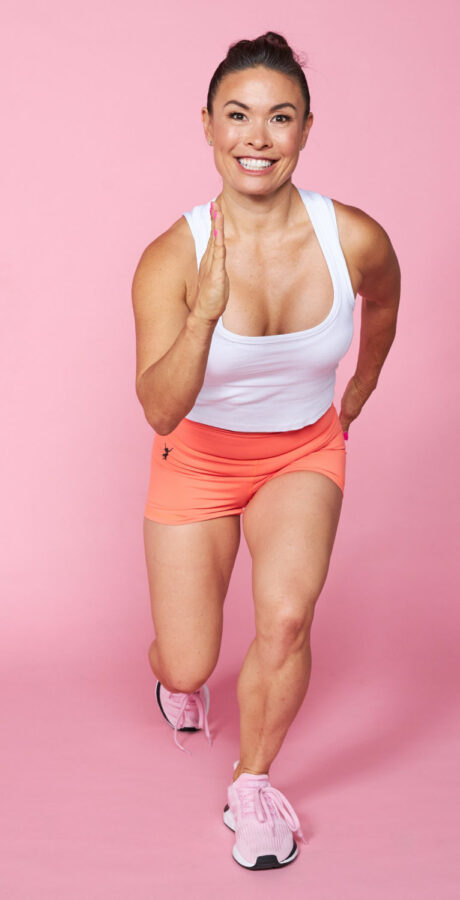
2. Curtsy Lunges Technique
 Technique
Stand with your feet hip-width apart arms extended out at shoulder height. Take a large step back with your right leg crossing it behind your left as if you were about to do a curtsy. Keeping your weight in your left foot, bend your knees lowering your body close to the ground. Slowly return to the start position. REPS: x 10 each leg
Beginners – Do standard reverse lunges
Experienced – Hold each lunge for one breath and return leg to start as slow as possible
Tips
- Engage your abs and butt muscles.
- Keep your front toe in line with your knee.
- Ensure your front leg is completely pointing forward.
- Slow technique is very important to protect your joints
- Remember to breathe deeply.
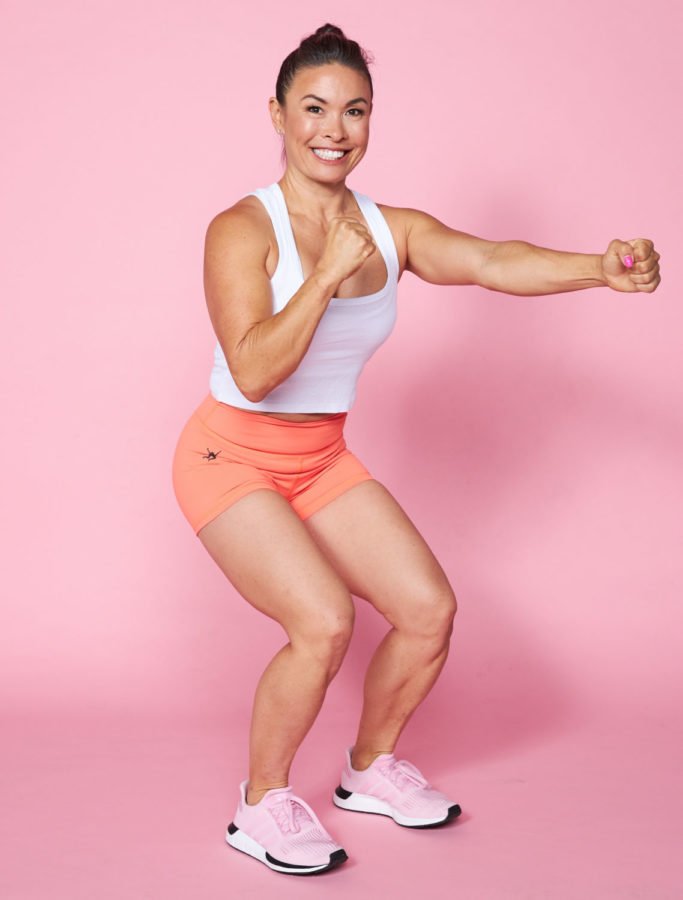
3. Wall Squat Boxing Technique
 Technique
Start in a narrow squat with your back against a wall and arms straight out in front of your at heart level. Punch straight out in front of you, alternating arms. REPS: x 30
Beginners – Just hold a wall squat resting your hands on your thighs.
Experienced – Increase the speed of your punches and hold a deeper wall squat so your knees are at a 90 degree angle. Hold this for 30 seconds.
Tips
- Keep your upper body straight ensuring your hips, ribcage, shoulders and back of the head are pressed against the wall.
- Brace your tummy to reduce the gap behind the lower back and tuck your chin down to lengthen the back of your neck. Keep feet hip-width apart, toes pointing slightly outwards, and knees in line with your toes.
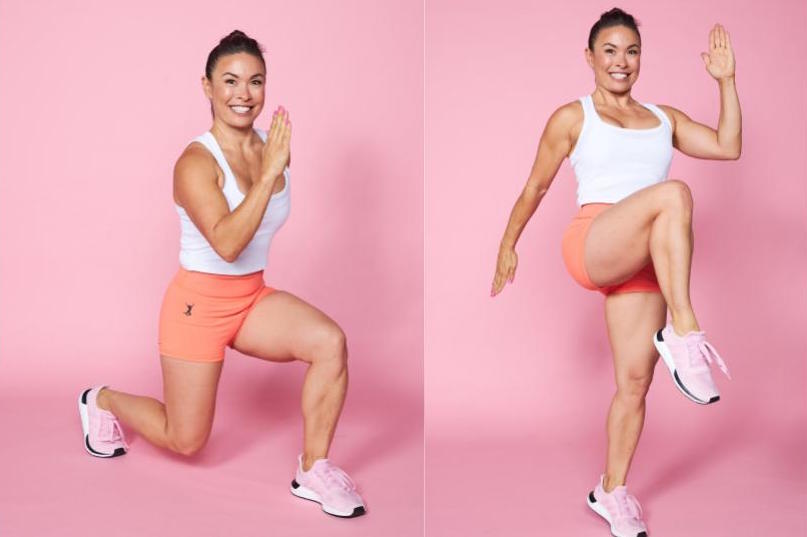
4. Power Skips Technique
 Technique
Starting in a lunge position, drive the back leg up and skip as high as you possibly can raising your knee to hip height while extending the opposite arm straight overhead. Alternate arm swings with elbows bent at 90 degrees like you are sprinting. To minimise impact as you skip, raise up off your heels onto your toe that is on the ground and back down onto your heel slowly. Do 12 repetitions on one leg before repeating on the other leg to maintain posture. REPS: 12 x each leg
Beginners – Remove the hop and make it a repeater knee to keep the movement low impact.
Experienced – Lift knees higher and raise up onto the toe of your supporting foot as you lift your knee.
Tips
- Bend at your knees not at your back to reduce impact and pressure on your joints.
- Power through the arms to help drive the knees up high.
- Drop shoulders away from your ears and squeeze your shoulder blades back toward each other.
- Brace core tightly.
- Remember to breathe deeply.
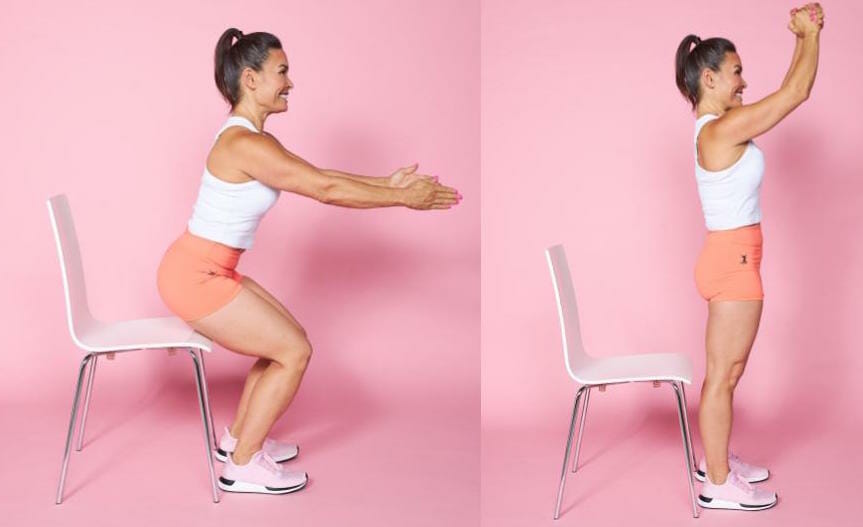
5. Squat to Chair with Claps Technique
 Technique
Standing in front of a chair with your feet hip-width apart, slowly lower your butt toward the chair until it taps it. Return to a standing position and clap above your head. Before performing the next squat, wiggle your toes to ensure your weight is placed in your heels. REPS: x 40
Beginners – Do shallow squats
Experienced – Hold the squat for a moment before standing up. Clap as you squat and clap again as you stand.
Tips
- Squat as low as the seat of the chair.
- Tighten your core and keep your chest proud.
- Ensure toes and knees are slightly pointing outwards
- Look straight but keep chin tucked down.
6. Slow Skaters Technique
 Technique
Starting in a squat position with feet hip-width apart, step sideways landing with one foot behind the other in mini lunge position, swinging your arms in a skating motion at the same time. REPS: x 8 each side
Beginners – Take two steps to the right and then two steps to the left in a low squat. Stand up straight between every second step touch.
Experienced – Jump slightly higher and further.
Tips
- Tighten core.
- Try to keep hips square to the front.
- Keep toes on the ground to help with stability each time.
- Remember to breathe deeply.
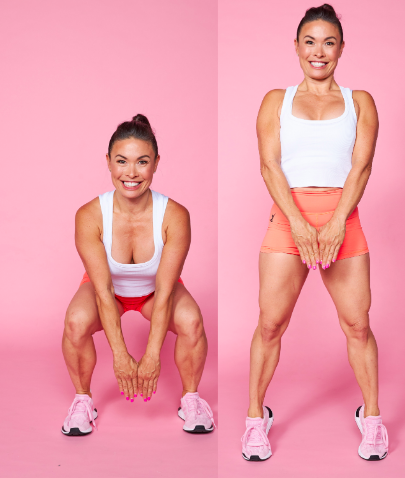
7. Frogger Extensions Technique
 Technique
Begin in a squat position with feet should-width apart (take care not to go too wide after having a baby). Place your pointer fingers together and hold your arms and hands straight down towards the floor. Squat and as you come back up, raise up onto your toes to perform a calf raise keeping in the same position. REPS: x 12
Tips
- To avoid injury, bend from the knees, not your back.
- Remember to breathe deeply.
8. Mini Burpees Technique
 Technique
Standing with your feet shoulder-width apart, arms by your side, squat and reach forward to place your hands on the floor. Come down onto your hands and knees and do one push up on your knees, then slowly return to a standing position. Repeat. REPS: x 6
Beginners – 6 squats followed by 6 push-ups on your knees. Repeat once.
Experienced – Squat jump, then kick both legs out behind you and lower entire body to the ground then spring back up to standing position.
Tips
- Engage your stomach muscles. Keep your back in a neutral position at all times.
- Bend at your knees, not your back.
- When squatting, push your body weight through your heels.
- Relax head, neck and shoulders.
- Remember to breathe deeply.
9. Side Plank Leg Lifts Technique
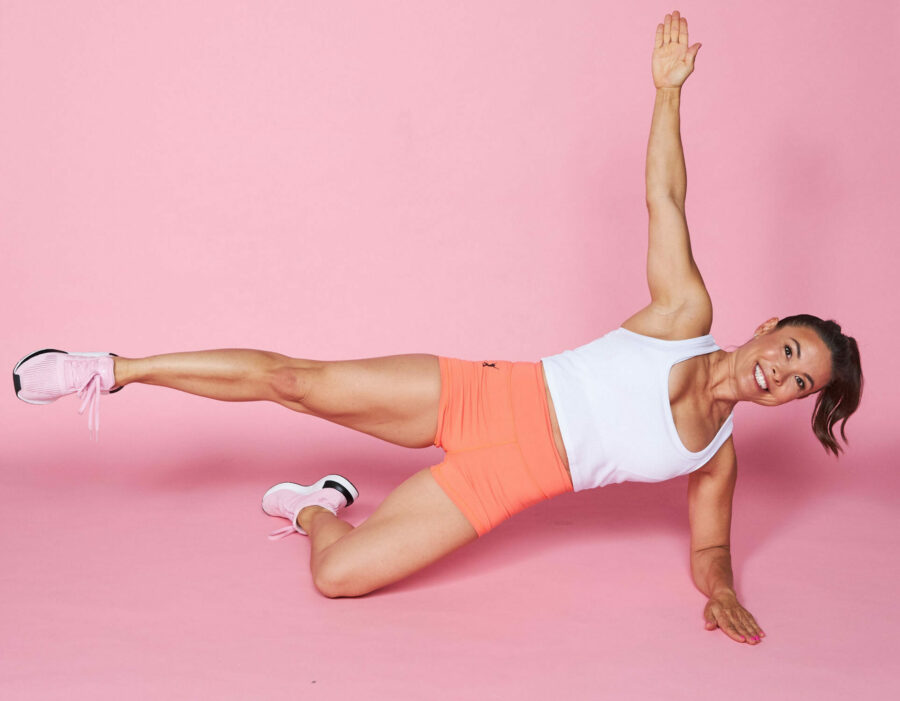 Technique
Starting on your side, with bottom leg bent at the knee, place one elbow on the ground directly under your shoulder. Keeping your spine lengthened and abdominals engaged, extend the top leg straight out ensuring it is in line with your spine and toes are pointed.
Extend your top arm straight up towards the ceiling and lift the top leg straight up just higher than your hip, then back down so it is hovering off the floor. REPS: x 10
Beginners – Lie on floor in a straight line (like a pencil), then lift the top leg only.
Experienced – Hold the leg up higher and hold for one breath before returning leg to start position. Keep bottom leg straight too and just do 5 reps.
Tips
- Ensure your bottom elbow is directly under your shoulder.
- Make sure you stabilise your torso and keep pelvic bone still.
- Keep hips lifted.
- Keep your neck in line with your spine, chin slightly tucked under and eyeline straight ahead.
- Relax your head, neck and shoulders.
- Remember to breath deeply.
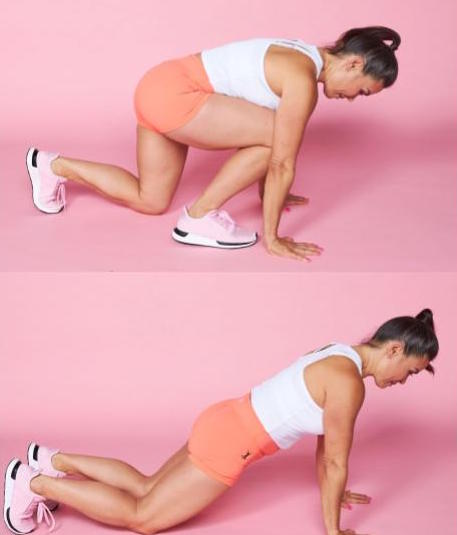
10.Mini Plank and Shell Stretch Technique
 Technique
Keeping your spine in a neutral position, start in a straight arm plank on your knees ensuring your elbows are positioned directly underneath your shoulders.
From plank, move into a shell stretch (also known as Child’s Pose) by lowering your head between your arms as you drive your hips up and push your butt back to your heels. Keep your hands and arms out in front of you for the entire movement. From here return to a straight arm plank on your knees and alternate from mini plank to shell stretch until you have completed 12 planks.
Beginners – Go from shell stretch to a modified plank on knees.
Experienced – Perform the exercise slowing and hold the plank for 2 breath each rep.
Tips
- Keep a straight line from elbow to shoulders, and heels and hips to shoulders.
- Engage your core and glutes.
11. Triceps Dips Technique
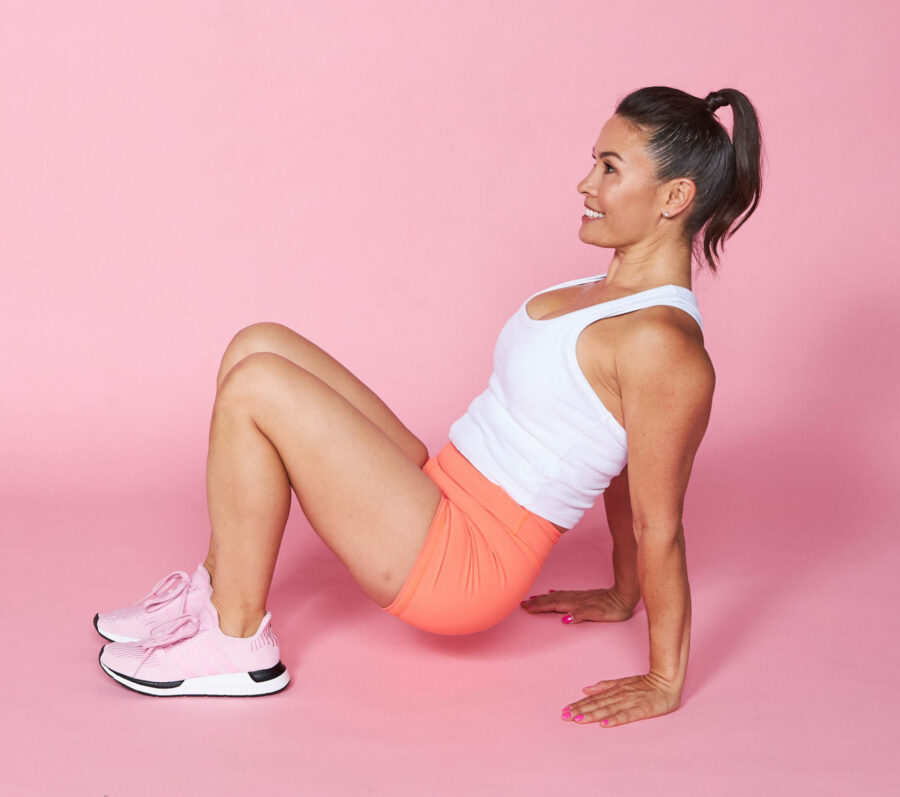 Technique
Sit on the floor and your knees bent, feet flat on the floor, hands positioned behind you with fingers pointing towards the body. Keeping abdominals tight, lift your hips off the floor and slowly bend your elbows and lower your body close to the floor. You should feel this movement working in the back of your arm (triceps).REPS x 15
Beginners – Keep butt on the floor and only bend the elbows.
Experienced – Perform tricep dips with alternate legs up in the air, or dip off a secure bench or very stable chair to increase the intensity.
Tips
- Keep back straight at all times.
- Open up your chest and heart and enjoy the feeling of this “heart opening’ stretch.
- Remember to breathe deeply.
12. Single Leg Hip Bridge Technique
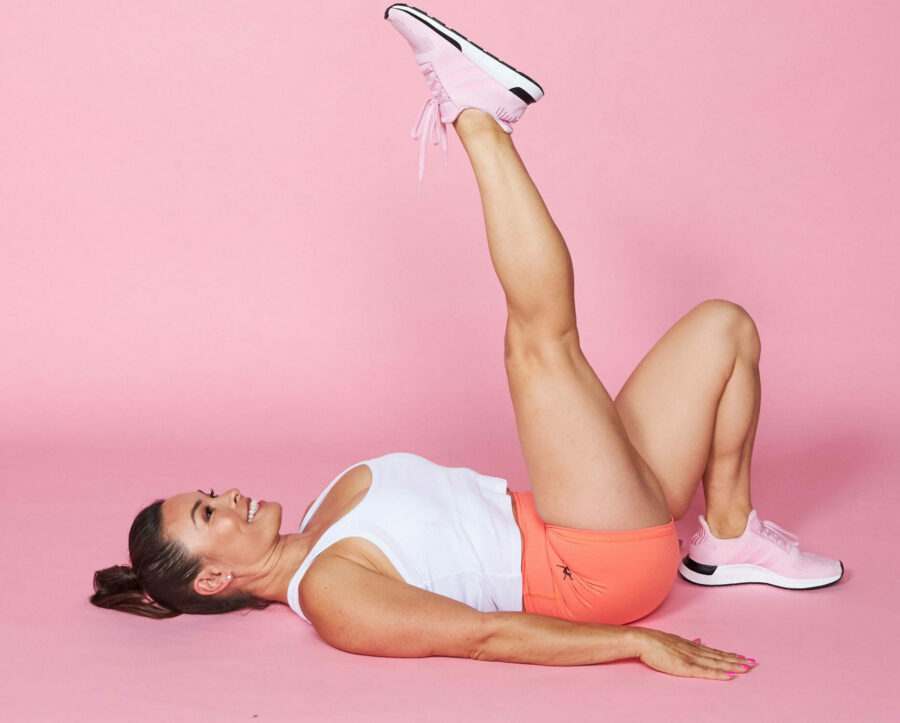 Technique
Lie on your back and tighten your abdominal, butt and thigh muscles. Raise your hips up to create a straight line from your knees to shoulders and slowly raise and extend one leg while keeping pelvis raised. REPS x 15
Beginners – Perform a basic hip bridge without leg lift.
Experienced – At the top of the movement, swing your top leg in a straight line up and down 3 times before returning to the start.
Tips
- Squeeze your core and pull your belly button up and in towards your spine.
- Keep pelvic bone stable and horizontal in line with your shoulders.
- Tuck chin under and lengthen the back of your next
Note: When you slow down an exercise or change its range of motion you subsequently reduce the overall force going through the body. With any mothers, the important thing is – do not load fatigue/compromised/injured core/stomach muscles too early. Steer clear of anything isometric that challenges the core and high impact. Mums must be careful of their Pubic Symphysis (hips open up after birth and hormones released that promote over flexibility), therefore, keep squats narrow, not wider than shoulder width. Femur and hip leverage not safe until 100% recovered from child birth even with a C-section.
The affordable, realistic and easy-to-follow Mums-only Challenge
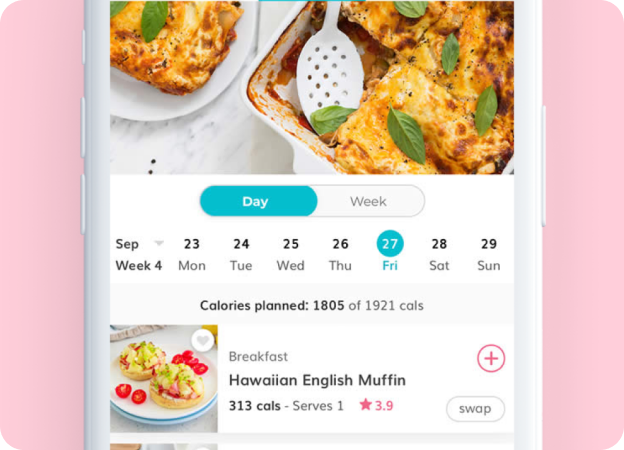
Think of the 28 Day Weight Loss Challenge as the best value personal trainer, dietitian, meal planner, chef and motivational coach with DAILY support – that you have access to every day – without the high cost and all created JUST FOR MUMS.
Each month is DIFFERENT on the 28 Day Weight Loss Challenge with over 100 NEW recipes added each month. EVERY MONTH you receive NEW 28 Days of FAMILY FRIENDLY customisable meal plans, daily exercise plans with videos and daily support. It’s also breastfeeding friendly.
The 28 Day Weight Loss Challenge has been able to help thousands of mums lose more than 3 million kilograms (combined).


BMI Calculator
Welcome to our FREE BMI Calculator. The Healthy Mummy has helped 100,000's of mum lose weight and regain their body confidence and we are confident that we can help you do the same too.rnrnUse this BMI calculator to check your body mass index (BMI) and find out if you’re a healthy weight
Is Body Mass Index reliable?
Please enter your weight and height as accurate as possible. Your results will appear here.


Be part of our friendly and supportive community
Want FREE delicious recipes, fitness tips and great specials?
© 2026 The Healthy Mummy. All Rights Reserved.
Apple and the Apple logo are trademarks of Apple Inc., registered in the U.S. and other countries. App Store is a service mark of Apple Inc., registered in the U.S. and other countries. | Google Play and the Google Play logo are trademarks of Google LLC.
19,666 Reviews
7,704 Reviews