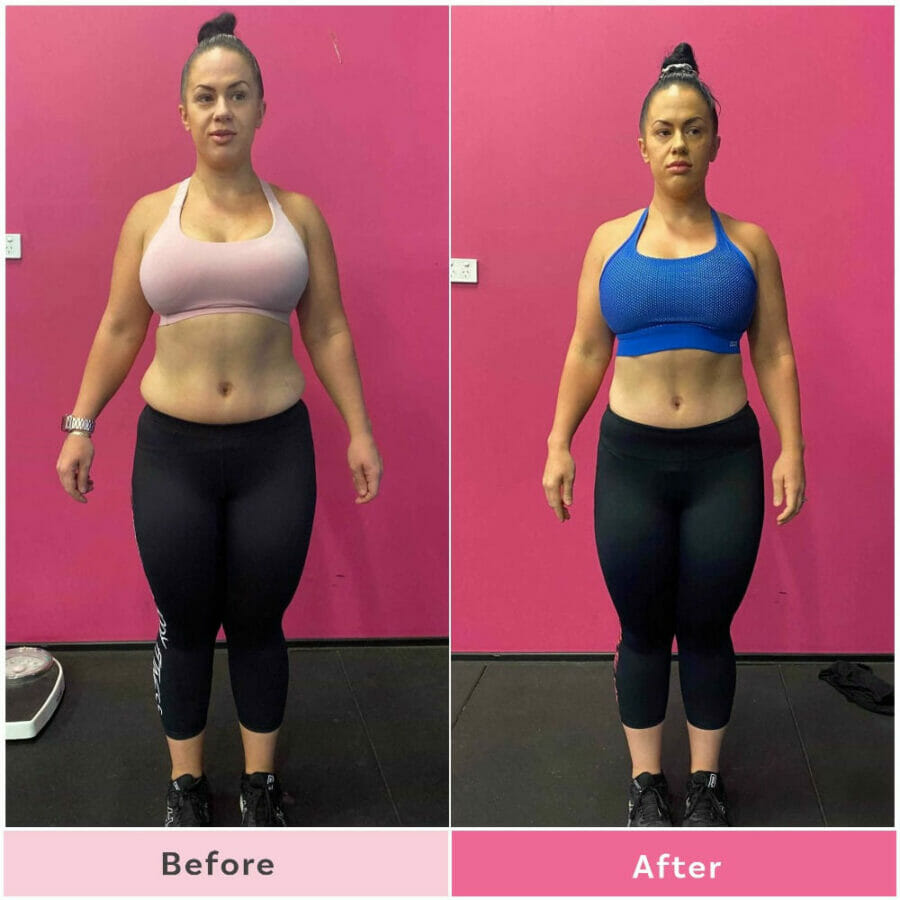
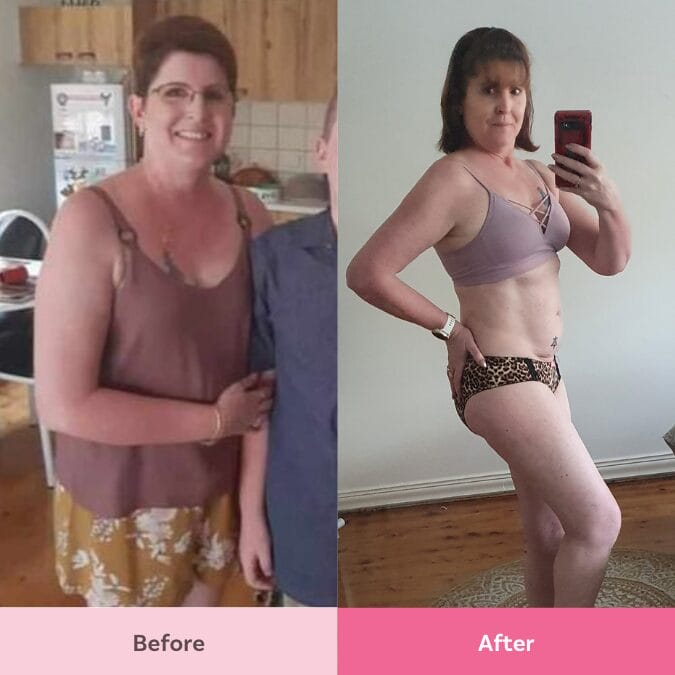
Photographer Melissa Timmer, who has lost 37kg, explains why it’s important to take progress photos
Melissa Timmer, who has lost 37kg through The Healthy Mummy, shares the best way to take progress photos.
They say a picture is worth a hundred words and we couldn’t agree more…especially when it comes to progress photos!
When you’re on the 28 Day Weight Loss Challenge, it’s easy to get disheartened when you step on the scales and the numbers have barely moved. But taking photos at every stage gives a great visual reminder of how far you’ve come!
Healthy Mummy Melissa Timmer, who has lost 37kg through The Healthy Mummy, shares the best way to take progress photographs.
Melissa Timmer on the best ways to take progress pics
I can’t express enough how important taking photos at the start of your journey is, it’s just as important as starting the journey.
It’s the best way to track your progress because even when the scales might not be moving, which I can promise you at some stage this will happen, your body shape will be changing still, and seeing it in a picture is all the motivation you will need to keep going.
YES, it’s super daunting but try not to focus on the negative side and think how you are on the right path now and you’re going to make a change and smash those goals out, six months down you will be forever grateful that you took those photos.
Photos don’t lie, but angles, lighting and poses are everything!
You must understand how to take the right photo especially if you will be doing it on a regular basis to track your progress.
Melissa’s top tips
1. First thing is to think about what you’re going to wear, less is the best, so usually a black bra and undies is the way to go.
2. Second thing, look for a spot in your house that is a blank wall, preferably at least 2- 3 metres long with absolutely NOTHING ON THE WALL OR FLOOR.
3. Third thing, if you can do it natural light but if not make sure your taking your pics on the same day at the same time, our hormones can our affect our bodies dramatically, so pics should be done every 4 weeks apart.
4. The Final step is who is taking the pics for you ? Will you be doing them yourself?
I highly recommend getting a tripod and putting your phone on a timer, you want to make sure the phone is at the same place every single time, so if you have a desk, table, chair or something that you can constantly use and will never change height, pop your tripod on that, you will always get the same distance and angle.
How to pose for your progress photos
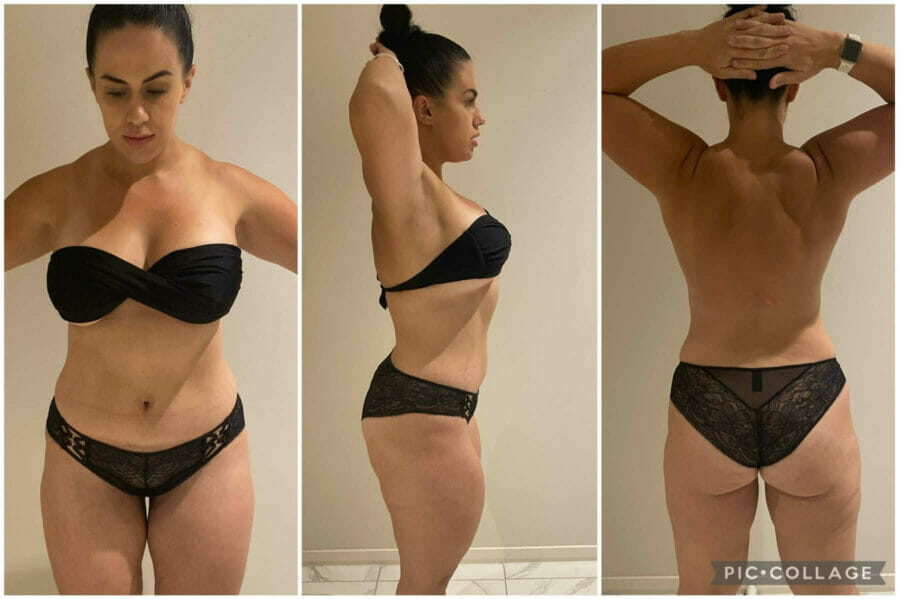
FIRST POSE: Once you have read these steps your ready to start, facing straight directly on to the camera with your hands up and straight so your not blocking your sides, you should look similar to a capital ‘T’.
SECOND POSE: turn to the side and keep your hands down by your side.
THIRD POSE: turn to face the back wall so you can get a good back shot, place your hands behind your head and link your fingers together, this is the easiest way to remember the position and get it the same in every shot by seeing your whole body.
FOURTH POSE: turn to the final side and bring your hand up directly in front of you, almost like you’re reaching out to grab something in front of you.
Ready to Drop a Dress Size in 28 Days?
Never Go Hungry
Our program offers NO 1200 calorie restrictions
Workout at Home
Follow guided training videos with expert fitness instructors (no equipment needed!)
Feel Supported 24/7
In our private support groups with other mums just like you!
Eat Delicious and Healthy Food
With family-friendly, weekly meal plans & over 6,000 easy recipes developed by nutritionists
No lock-in contracts, cancel anytime.


BMI Calculator
Welcome to our FREE BMI Calculator. The Healthy Mummy has helped 100,000's of mum lose weight and regain their body confidence and we are confident that we can help you do the same too.rnrnUse this BMI calculator to check your body mass index (BMI) and find out if you’re a healthy weight
Is Body Mass Index reliable?
Please enter your weight and height as accurate as possible. Your results will appear here.


Be part of our friendly and supportive community
Want FREE delicious recipes, fitness tips and great specials?
© 2026 The Healthy Mummy. All Rights Reserved.
Apple and the Apple logo are trademarks of Apple Inc., registered in the U.S. and other countries. App Store is a service mark of Apple Inc., registered in the U.S. and other countries. | Google Play and the Google Play logo are trademarks of Google LLC.
19,687 Reviews
7,712 Reviews